Solid rivet head cracking is a critical defect that primarily stems from four main areas: improper driving force, incorrect tool selection, rivet material and preparation issues, or poor hole preparation. When excessive force is applied too quickly (over-driving), the metal work-hardens and fractures instead of forming correctly. Similarly, using a worn or improperly shaped rivet set, a bucking bar with insufficient mass, or installing rivets that have exceeded their work-life after heat treatment can all lead to catastrophic cracks in the driven head. This comprehensive guide from the experts at RivetJL.com will walk you through diagnosing the root causes of rivet head cracking and provide actionable solutions to ensure your assemblies meet the highest standards of quality and safety.
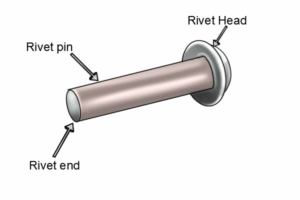
Table of Contents
- Understanding the Anatomy of a Solid Rivet Installation
- The Primary Culprits: A Deep Dive into the Causes of Rivet Head Cracking
- The Cures: A Proactive and Reactive Troubleshooting Guide
- A Quick-Reference Troubleshooting Table for Rivet Head Cracks
- Beyond the Basics: Advanced Considerations for Preventing Cracks
- Conclusion: Partnering with RivetJL.com for Flawless Fastening
Understanding the Anatomy of a Solid Rivet Installation
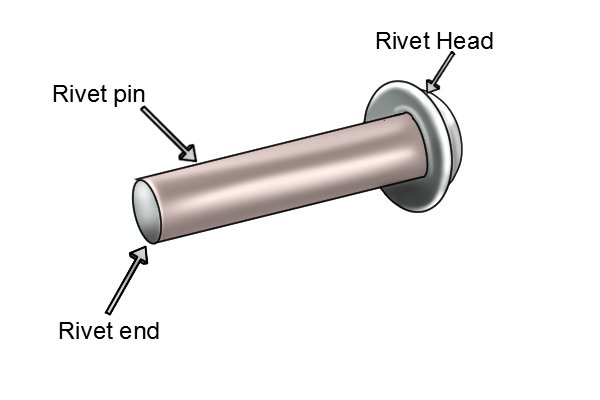
Before diving into troubleshooting, it’s crucial to understand the terminology of a correctly installed solid rivet. A solid rivet installation involves forming a second head from the rivet’s shank, permanently clamping materials together. The original, pre-formed head is called the manufactured head. The head formed during the installation process is known as the shop head or, more commonly, the bucked head. The goal of riveting is to use a rivet gun on the manufactured head and a bucking bar on the shank end to upset, or “buck,” the shank so it expands to fill the hole and forms a properly dimensioned shop head. It is almost always this newly formed shop head where cracking occurs.
A successful installation results in a shop head that is dimensionally correct—typically 1.5 times the original shank diameter in width and 0.5 times the shank diameter in height—and is free from any defects. The process relies on the plastic deformation of the rivet material. When done correctly, the metal flows and forms a strong, continuous grain structure. However, when conditions are not optimal, the material is stressed beyond its limits, leading to the fractures and fissures we identify as head cracking, a defect that can severely compromise the joint’s structural integrity.
The Primary Culprits: A Deep Dive into the Causes of Rivet Head Cracking
Why do solid rivet heads crack? The answer lies in a chain of events where the material is forced to deform in a way it cannot tolerate. Identifying the specific cause requires a systematic examination of your process, tools, materials, and preparation. Below, we explore the four most common culprits in detail.
Cause 1: Improper Driving Force and Technique
The force delivered by the rivet gun is a delicate balance. Over-driving is the most frequent cause of a cracked shop head. This happens when the air pressure is set too high or the operator applies the gun for too long, delivering sharp, excessively powerful blows. Instead of allowing the metal to flow and form, this immense force causes the material to work-harden almost instantly and then fracture under the stress. Think of it like trying to bend a cold piece of metal too quickly—it’s more likely to snap than to bend smoothly.
Conversely, while less common for cracking, under-driving can also contribute to the problem indirectly. If the force is too low, the operator may be tempted to “hammer” on the rivet for an extended period to form the shop head. This repeated, prolonged work-hardening of the material can make it brittle. If a subsequent, stronger impact is then applied to finish the job, the already-hardened material is highly susceptible to cracking. Furthermore, a rivet gun that is not held perfectly perpendicular (at a 90-degree angle) to the rivet shank can cause an uneven distribution of force, concentrating stress on one side of the shop head and initiating a crack.
Cause 2: Incorrect Tooling and Setup
Your riveting tools are just as important as your technique. Using a worn or incorrect rivet set (the tool piece that fits into the rivet gun and contacts the manufactured head) is a common mistake. If the cup of the set is too shallow, too deep, or worn into an irregular shape, it won’t properly support the manufactured head. This can cause the rivet to bend in the hole during driving, placing abnormal stress on the forming shop head. Similarly, if the face of the rivet set is not flush and smooth, it can’t deliver the force cleanly down the shank.
The bucking bar plays an equally critical role. What is the most common bucking bar error? Using one with insufficient mass. A bucking bar that is too light will bounce off the rivet shank instead of providing the solid inertia needed to properly form the shop head. This bouncing effect creates a “slapping” action rather than a clean upsetting force, which can easily lead to fractures. The shape and condition of the bucking bar face are also vital; a face with nicks, burrs, or an improper radius can create stress risers on the shop head as it forms, which are perfect starting points for cracks.
Cause 3: Material and Rivet Selection Issues
Sometimes, the problem lies with the rivet itself. Using a rivet made of the wrong alloy for the job can be a primary cause. Different rivet materials (e.g., 2117-T4 “AD” rivets vs. 2024-T4 “DD” rivets) have vastly different ductility and strength properties. So-called “icebox” rivets (like the D and DD series) must be heat-treated and then kept at low temperatures until just before use. If these rivets are allowed to warm up for too long, they begin to age-harden. Attempting to drive a rivet that has hardened beyond its workable state is a guaranteed recipe for a cracked shop head.
Another material-related issue is attempting to re-drive a rivet. If a shop head is formed incorrectly (e.g., undersized or crooked) and an attempt is made to “correct” it by driving it again, you are working with material that has already been significantly work-hardened. The chances of this secondary driving operation causing cracks are extremely high. The golden rule of riveting is that it is a one-time process. If the installation is bad, the rivet must be drilled out and replaced with a new one.
Cause 4: Deficiencies in Hole Preparation
The foundation of a good rivet joint is a perfectly prepared hole. A hole that has burrs or sharp edges is highly problematic. As the rivet shank expands to fill the hole during driving, these sharp edges act like a knife, cutting into the expanding metal and creating a significant stress concentration point. When the shop head begins to form, a crack will often propagate from this nick. Proper deburring of every hole on both sides of the workpieces is a non-negotiable step.
Furthermore, hole size and alignment are critical. A hole that is too small will not allow the rivet shank to be inserted freely, and forcing it can score the shank, creating another potential failure point. Conversely, a hole that is too large forces the rivet material to expand excessively to fill the void before it can even begin to form the shop head, which can lead to cracking. Finally, when riveting multiple sheets of material, if the holes are not perfectly aligned, the rivet will be forced to bend as it’s driven, creating shear stress on the shank and uneven forces on the shop head, which is a common cause of fractures.
The Cures: A Proactive and Reactive Troubleshooting Guide
Now that we’ve identified what causes rivet heads to crack, we can focus on the solutions. The best cure is prevention, which involves a combination of calibrated tools, proper technique, and meticulous preparation.
Cure 1: Calibrating Driving Force and Mastering Technique
How can you prevent cracks from over-driving? Start by calibrating your air pressure. Don’t guess. Use a regulator and begin with a lower pressure setting, performing test installations on scrap material that matches your workpiece. Gradually increase the pressure until you can form a proper shop head in a short, controlled burst (typically 1-2 seconds). The goal is a firm, forming push, not a violent, shattering impact. An experienced operator can often tell by the sound and feel of the gun when the head is properly formed.
Always ensure your rivet gun is held perfectly perpendicular to the work surface. Use your free hand to stabilize the gun and maintain the 90-degree angle throughout the drive. This ensures the force travels straight down the shank for a symmetrical shop head. Practice on scrap until this becomes second nature.
Cure 2: Selecting and Maintaining the Right Tools
The solution here is simple but crucial: use the right tools for the job and keep them in excellent condition. Always match your rivet set to the specific type and size of rivet you are using. For example, a universal head AN470 rivet requires a different set than a flush head AN426 rivet. Regularly inspect your rivet sets and bucking bars for wear, chips, or damage. Discard and replace any tool that is not in perfect condition; the cost of a new tool is minuscule compared to the cost of a failed joint.
When selecting a bucking bar, choose one with sufficient mass—a common rule of thumb is to use a bar that is at least 3-4 times the weight of the rivet gun. This provides the necessary inertia for a clean upset. Ensure the face of the bucking bar is polished smooth and held firmly and squarely against the rivet shank before and during the entire driving process.
Cure 3: Ensuring Material Integrity and Proper Handling
Double-check that you are using the correct rivet for your application, paying close attention to the material specification (e.g., AD, D, DD). If you are using heat-treatable “icebox” rivets, you must adhere strictly to the manufacturer’s guidelines for storage and work-life. Use a log to track when rivets are removed from the freezer and ensure they are driven well within their specified time limit. Once that time has expired, they cannot be used for critical applications.
Embrace the “one-time drive” rule. Never re-drive a rivet. If a shop head is malformed, cracked, or otherwise unacceptable, the only correct procedure is to carefully drill it out and install a new rivet in a freshly inspected and prepared hole. Training operators on this non-negotiable rule is essential for quality control.
Cure 4: Perfecting Hole Preparation for a Flawless Fit
Attention to detail during hole preparation pays dividends. Always use the correct size drill bit to create a hole that allows the rivet to be inserted with a light push fit. After drilling, thoroughly deburr both sides of every hole. A dedicated deburring tool is inexpensive and highly effective. Run your finger over the edge of the hole to ensure it is smooth and free of any sharp edges or metal slivers.
When joining multiple layers, use temporary fasteners like Clecos or service bolts in adjacent holes to ensure the workpieces are tightly clamped and the holes are perfectly aligned before you begin riveting. This prevents the sheets from shifting and ensures the rivet is not subjected to shear forces during installation.
A Quick-Reference Troubleshooting Table for Rivet Head Cracks
For a quick diagnosis on the shop floor, use this troubleshooting table. Identify the visual cue and review the most likely causes and recommended actions.
| Symptom / Defect | Likely Cause(s) | Recommended Solution(s) |
|---|---|---|
| Shattered or severely cracked shop head | 1. Gross over-driving (air pressure too high). 2. Driving a rivet that has exceeded its work-life (e.g., an “icebox” rivet that has age-hardened). | 1. Reduce rivet gun air pressure and test on scrap. 2. Verify rivet specification and handling procedures. Discard expired rivets. |
| Single crack radiating from the center of the shop head | 1. Bucking bar is too light or bouncing. 2. Workpiece material is vibrating during driving. | 1. Use a heavier bucking bar. Ensure it’s held firmly. 2. Ensure workpieces are securely clamped. |
| Cracks around the edge/base of the shop head | 1. Hole has sharp edges or burrs. 2. Rivet gun was held at an angle. 3. Incorrectly shaped or worn bucking bar. | 1. Drill out the rivet and thoroughly deburr the hole. 2. Train operator to keep the gun perpendicular. 3. Inspect and replace the bucking bar. |
| Cracked after attempting to fix a malformed head | Re-driving a work-hardened rivet. | Enforce the “one-time drive” rule. Drill out and replace any defective rivet installation. Do not attempt to repair. |
Beyond the Basics: Advanced Considerations for Preventing Cracks
For industries like aerospace and defense, where joint failure is not an option, quality control goes even deeper. It’s essential to have a robust understanding of different rivet alloy characteristics. For example, an ‘AD’ (2117 alloy) rivet is very ductile and forgiving, while a ‘D’ (2017 alloy) or ‘DD’ (2024 alloy) rivet offers higher strength but requires much stricter process control, including the critical heat treatment and cold storage mentioned earlier. Your team must be trained to identify these rivets and understand their unique handling requirements.
Furthermore, as automated riveting systems become more common, the principles remain the same, but the troubleshooting approach changes. In an automated system, cracking may be due to miscalibrated force sensors, worn end effectors (the robotic equivalent of a rivet set and bucking bar), or programming errors in the driving parameters. Regular calibration and preventative maintenance schedules for automated equipment are paramount to preventing widespread quality issues that can be produced at a rapid rate.
Conclusion: Partnering with RivetJL.com for Flawless Fastening
A cracked rivet head is more than a cosmetic flaw; it is a serious structural defect that indicates a fundamental problem in the installation process. By systematically evaluating the four key areas—driving technique, tooling, material handling, and hole preparation—you can effectively diagnose and eliminate the root cause of the issue. Remember that consistency, precision, and adherence to procedure are the cornerstones of reliable riveted joints.
At RivetJL.com, we are more than just a supplier of high-quality solid rivets. We are your partners in manufacturing excellence. With decades of expertise, we can provide not only the fasteners you need but also the technical support to help you solve your most challenging assembly problems. If you’re struggling with installation issues or want to optimize your processes, contact our team of experts today. Let’s work together to build stronger, safer, and more reliable products.