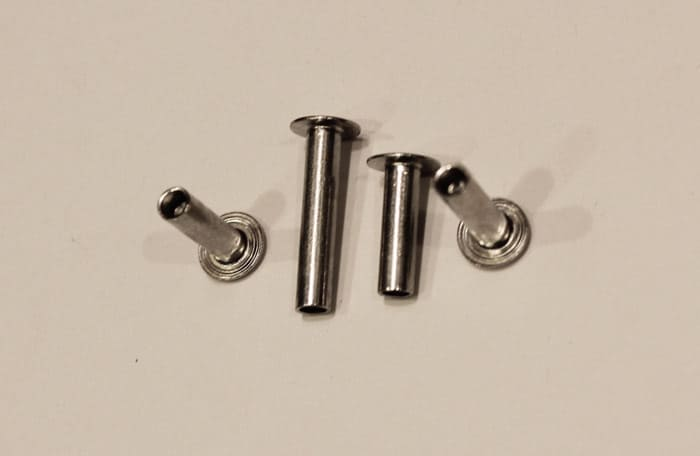
Ordering custom solid rivets requires a precise definition of five critical parameters: material, head style, shank diameter, rivet length, and finish/coating. Getting these specifications right from the start ensures your fasteners meet the exact functional, structural, and environmental demands of your application, preventing costly delays, production errors, and potential part failure. This guide will walk you through each essential parameter, transforming your design blueprint into a successful production batch.
Understanding the Importance of Precision in Custom Rivet Specification
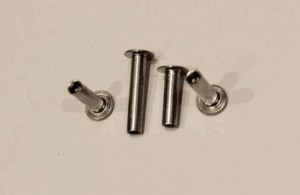
Solid rivets are one of the oldest and most reliable methods of fastening, renowned for creating strong, permanent joints. Unlike standard, off-the-shelf components, custom rivets are manufactured to your unique specifications. This bespoke approach is essential when dealing with specific load requirements, unconventional materials, or unique assembly constraints. However, the success of a custom order hinges entirely on the clarity and accuracy of the information provided to the manufacturer. An ambiguous or incomplete specification can lead to a batch of useless parts, wasted budget, and significant project setbacks. By meticulously defining the critical parameters, you bridge the communication gap between your engineering needs and the manufacturing reality, ensuring the final product performs exactly as intended.
Table of Contents
- Parameter 1: Material Selection – The Foundation of Rivet Performance
- Parameter 2: Head Style – Balancing Form and Function
- Parameter 3: Shank Diameter – The Key to a Secure Joint
- Parameter 4: Rivet Length – Ensuring a Perfect Clinch
- Parameter 5: Finish and Coating – Protection and Aesthetics
- Partnering with an Expert for Your Custom Rivet Needs
Parameter 1: Material Selection – The Foundation of Rivet Performance
The material you choose for your custom solid rivets is arguably the most fundamental decision you will make. It directly dictates the fastener’s strength, ductility, corrosion resistance, weight, and thermal conductivity. Selecting an inappropriate material can compromise the integrity of the entire assembly. For example, using a rivet material that is significantly harder than the components being joined can damage the base materials during installation. Conversely, a rivet that is too soft may not provide the necessary shear and tensile strength. The operating environment is another crucial factor; a rivet exposed to moisture or chemicals requires a material with inherent or added corrosion resistance.
Common Solid Rivet Materials and Their Applications
Your choice of material should be a deliberate balance between mechanical properties, environmental resilience, and cost. Each material offers a unique profile, making it suitable for different industries and applications. Here are some of the most common options:
- Steel (Low Carbon): This is the workhorse of the rivet world. It’s cost-effective, strong, and easy to form. Ideal for general-purpose structural applications where corrosion is not a primary concern or will be mitigated by a protective coating.
- Stainless Steel (300 & 400 Series): Offers an excellent combination of strength and superior corrosion resistance. The 300 series (e.g., 302, 304) is great for food-grade, marine, and medical applications, while the 400 series provides higher strength and wear resistance.
- Aluminum: Lightweight, naturally corrosion-resistant, and easy to install. Aluminum rivets are the top choice for the aerospace industry and in applications where minimizing weight is critical, such as in transportation and electronics.
- Brass & Copper: These materials are chosen for their excellent electrical conductivity, thermal properties, and aesthetic appeal. They are non-magnetic and offer good corrosion resistance, making them popular in electronics, plumbing, and decorative applications.
How to Choose the Right Rivet Material
When specifying the material, ask yourself these critical questions:
- What is the required strength? Consider both the shear strength (resistance to forces perpendicular to the rivet) and tensile strength (resistance to being pulled apart).
- What is the operating environment? Will the rivet be exposed to moisture, saltwater, chemicals, or extreme temperatures? This will determine the need for corrosion-resistant materials like stainless steel or aluminum.
- Are the joined materials compatible? To prevent galvanic corrosion, the rivet material should be galvanically compatible with the materials it is fastening. For example, avoid using a copper rivet to join aluminum plates.
- Are there special requirements? Does the application require non-magnetic properties (use brass), electrical conductivity (use copper or brass), or light weight (use aluminum)?
Parameter 2: Head Style – Balancing Form and Function
The head of a solid rivet serves two purposes: it provides a bearing surface to distribute the clamping load and it contributes to the final appearance of the assembly. The shape and size of the head affect both the installation process and the performance of the finished joint. A head that is too small might pull through the material under load, while an overly large or tall head could interfere with other components or create an aerodynamic drag.
A Visual Guide to Common Rivet Head Styles
Different head styles are standardized by organizations like the Industrial Fasteners Institute (IFI) to ensure consistency. Choosing the right one depends on your application’s clearance, strength, and aesthetic requirements.
| Head Style | Profile | Primary Use Case |
|---|---|---|
| Round Head | High-profile dome | General-purpose structural applications where a large bearing surface and high strength are needed. |
| Flat Head | Flat top, straight sides | Provides maximum bearing surface for soft or thin materials. Not ideal for countersunk holes. |
| Countersunk Head (90° or 100°) | Conical shape | Used in countersunk (beveled) holes to sit flush with the material surface. Critical for aerodynamics and a smooth finish. |
| Truss Head (or Pan Head) | Wide, low-profile dome | Offers a large bearing surface with a lower profile than a round head, good for covering large holes in thin materials. |
| Universal Head | Modified round head | A compromise design, originally for aerospace, to replace both round and flat heads, simplifying inventory. |
Key Considerations for Selecting a Head Style
Your blueprint should clearly specify the head style, either by name (e.g., “IFI-114 Round Head”) or by providing detailed dimensions for a custom profile. Consider the following when making your choice:
- Surface Finish: Do you need a flush surface? If so, a Countersunk Head is the only option.
- Material Thickness: Are you joining thin sheets? A Truss Head or Flat Head provides a wider bearing surface to prevent pull-through.
- Strength Requirements: For heavy-duty structural joints, the deep profile of a Round Head offers excellent strength and durability.
- Tooling Access: Ensure there is enough clearance around the joint for the rivet set (the tool used to form the head during installation). High-profile heads require more vertical space.
Parameter 3: Shank Diameter – The Key to a Secure Joint
The shank is the body of the rivet, and its diameter is a critical dimension that determines the rivet’s shear strength. The shank is designed to fill the hole in the materials being joined completely. An undersized rivet will not fill the hole properly, leading to a loose joint that can move and fret, eventually causing failure. An oversized rivet will not fit in the hole at all, halting your assembly line. Precision here is non-negotiable.
Defining and Measuring Shank Diameter
The shank diameter is measured on the body of the rivet, typically just below the head fillet. It is usually specified in fractions of an inch (e.g., 1/8″, 5/32″) or in decimal form (e.g., 0.125″, 0.156″). When ordering custom rivets, it’s best practice to provide the decimal value to at least three or four places to avoid ambiguity. This dimension should be determined based on the hole size in your parts. A general rule is that the hole should be slightly larger than the rivet shank to allow for easy insertion, typically between 0.003″ and 0.007″ larger.
The Critical Role of Tolerances in Shank Diameter
For custom manufacturing, simply stating “1/4 inch diameter” is insufficient. You must specify the tolerance—the acceptable range of variation for that dimension. For example, a proper specification would be 0.250″ +/- 0.002″. This tells the manufacturer that any rivet with a shank diameter between 0.248″ and 0.252″ is acceptable. The tightness of your tolerance depends on the application’s demands. High-precision aerospace or automated assembly lines may require very tight tolerances, while general fabrication may allow for a wider range. Tighter tolerances often increase manufacturing costs, so it’s important to specify what is truly necessary for your joint to function correctly without over-engineering.
Parameter 4: Rivet Length – Ensuring a Perfect Clinch
The length of the rivet is just as critical as its diameter. It must be long enough to pass through the materials being joined (the “grip”) and have enough extra material (the “clinch allowance”) to form a strong, properly sized buck-tail on the other side. A rivet that is too short will result in a weak, undersized buck-tail that cannot carry the design load. A rivet that is too long will require excessive force to form and may result in a misshapen or improperly seated buck-tail, potentially damaging the surrounding material.
How is Rivet Length Properly Measured and Calculated?
The method for measuring length depends on the head style. For rivets with flat bearing surfaces underneath (like Round and Truss heads), the length is measured from the underside of the head to the end of the shank. For Countersunk rivets, the length is measured from the top of the head to the end of the shank, as the head is intended to be flush with the material surface. Always clarify this measuring point on your drawing.
The ideal rivet length is calculated using a simple formula:
Rivet Length = Grip + Clinch Allowance
The clinch allowance is the extra length needed to form the buck-tail. A standard rule of thumb is that the clinch allowance should be approximately 1.5 times the shank diameter. For example, to join two plates totaling 0.500″ thick (the grip) with a 1/4″ (0.250″) diameter rivet, the calculation would be:
Length = 0.500″ (Grip) + (1.5 x 0.250″) (Clinch Allowance) = 0.500″ + 0.375″ = 0.875″
This provides a starting point, but the exact allowance may vary based on the rivet material and the type of installation (hydraulic press vs. pneumatic gun).
Understanding Grip Range and Its Impact on Length
The grip or grip range is the total thickness of the materials being fastened. When ordering, you must provide this critical piece of information. If your assembly has slight variations in thickness, you need to communicate this “grip range” to your rivet manufacturer. They can help you determine if a single rivet length will suffice or if you need to order multiple lengths to accommodate the variation. A single rivet length can often handle a small grip range, but exceeding this range will compromise joint quality.
Parameter 5: Finish and Coating – Protection and Aesthetics
The final manufacturing step for many custom rivets is the application of a finish or coating. This is not merely for looks; coatings provide essential properties that the base material may lack, most notably corrosion resistance. A finish can also affect the rivet’s lubricity for easier installation, provide a specific color for coding or branding, or create a non-reflective surface for military applications.
Why Does the Rivet Finish Matter?
For a basic low-carbon steel rivet used in a dry, indoor environment, a “plain” or “oiled” finish might be sufficient. However, if that same steel rivet is used outdoors or in a humid environment, it will quickly rust and fail without a protective coating. The finish acts as a barrier between the rivet material and the corrosive elements in its environment. It’s a crucial specification for ensuring the long-term durability and reliability of your assembly.
Popular Finishes and Their Benefits
When specifying a finish, refer to industry standards (like ASTM specifications) to ensure clarity. Popular options include:
- Zinc Plating (ASTM B633): A very common and cost-effective finish that provides good corrosion resistance. It can be enhanced with a chromate conversion coating (clear, yellow, or black) for added protection and color.
- Cadmium Plating: Historically popular in aerospace for its excellent corrosion resistance and lubricity, but its use is now heavily restricted due to its toxicity. Modern, safer alternatives are often preferred.
- Anodizing (for Aluminum): An electrochemical process that thickens the natural oxide layer on aluminum rivets. It dramatically improves corrosion and wear resistance and can be dyed in various colors.
- Passivation (for Stainless Steel): A chemical process that removes free iron from the surface of stainless steel and enhances the formation of the passive chromium oxide layer, maximizing its natural corrosion resistance.
- Black Oxide: A conversion coating that provides mild corrosion resistance and a deep black appearance. It is often used for aesthetic purposes or where a non-reflective finish is needed.
Partnering with an Expert for Your Custom Rivet Needs
Navigating the complexities of material science, head geometry, and finishing standards can be daunting. The success of your custom rivet order doesn’t just depend on providing the right numbers; it depends on a deep understanding of how these parameters interact. That is where partnering with an experienced manufacturer like RivetJL makes all the difference.
At RivetJL, we don’t just take orders; we build partnerships. Our team of experts works with you from the blueprint stage to understand the full context of your application. We can help you refine your specifications, select the optimal material, recommend the most effective head style, and ensure the final finish meets your long-term performance goals. By leveraging our decades of manufacturing expertise, you can be confident that your custom rivet batch will be delivered on time, within budget, and to the exact tolerances your project demands. Contact us today to discuss your project and see how we can turn your custom rivet design into a manufacturing success.