Ensuring your rivet nuts are correctly installed begins with one critical, often overlooked factor: matching them to the right grip range. The grip range is the specific material thickness, from minimum to maximum, that a rivet nut is engineered to fasten securely. Choosing a rivet nut with an incorrect grip range is the single most common cause of installation failure, leading to everything from weak joints and spinning nutserts to compromised structural integrity. A successful, reliable, and durable connection is impossible without this fundamental match.

Are Your Rivet Nuts Correctly Installed — And Matched to the Right Grip Range? A Definitive Guide
Table of Contents
- What Exactly is Rivet Nut Grip Range?
- Why a Correct Grip Range is Non-Negotiable for Joint Integrity
- How Do You Determine the Right Grip Range for Your Application?
- The Anatomy of a Perfect Rivet Nut Installation
- How to Troubleshoot Common Rivet Nut Installation Failures
- Beyond Grip Range: Other Critical Factors for Rivet Nut Selection
- Partner with Rivet JL for Precision and Reliability
What Exactly is Rivet Nut Grip Range?
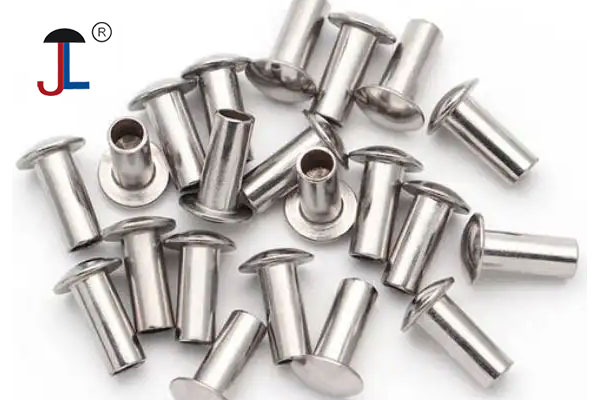
Think of a rivet nut’s grip range as its operational sweet spot. Before installation, a rivet nut has a smooth, unthreaded section on its body called the shank. When the installation tool pulls on the threads, this shank is designed to compress and form a strong, permanent bulge (or “upset”) on the blind side of the parent material. The grip range defines the acceptable thickness of that parent material. If the material is within this specified range, the bulge will form correctly, clamping the rivet nut securely in place.
Each rivet nut is meticulously engineered for a precise range. For example, a rivet nut might have a grip range of 0.02 inches to 0.08 inches (0.5mm to 2.0mm). This means it will only function correctly in materials that fall within that thickness. Using it on a thinner or thicker material guarantees failure. This precision is why simply grabbing any rivet nut is a recipe for disaster; it’s about selecting a fastener engineered specifically for your material’s dimensions.
Why a Correct Grip Range is Non-Negotiable for Joint Integrity
Selecting the wrong grip range isn’t a minor mistake—it fundamentally undermines the purpose of the fastener. The consequences can range from frustrating re-work to catastrophic joint failure. Let’s examine what happens at both ends of the spectrum.
Scenario 1: The Grip Range is Too Short for the Material (Material is Too Thick)
When you attempt to install a rivet nut into a material that is thicker than its maximum specified grip range, the unthreaded shank is too short to properly form the bulge on the blind side. The tool will apply force, but the shank won’t have enough room to compress correctly. This results in an incomplete or malformed upset. The rivet nut will not be fully seated and will feel loose or spin in the hole immediately. There is virtually zero clamping force, making the fastener completely useless and unable to bear any load.
Scenario 2: The Grip Range is Too Long for the Material (Material is Too Thin)
This is a more deceptive but equally problematic issue. If the parent material is thinner than the rivet nut’s minimum grip range, there’s an excess of shank material. When the installation tool applies force, the bulge begins to form, but it doesn’t make contact with the blind side of the material when it should. The excess material continues to compress, leading to a loose, improperly formed bulge that “floats” behind the material. This creates a gap, preventing the rivet nut from clamping down tightly. The result is a fastener that will spin under torque (a “spinner”) and has significantly reduced pull-out strength, dooming the connection to fail under load or vibration.
How Do You Determine the Right Grip Range for Your Application?
Thankfully, identifying the correct grip range is a straightforward process that requires precision. Following these steps ensures you select the perfect rivet nut every time.
Step 1: Precisely Measure Your Material Thickness
Guesswork is not an option. You must measure the thickness of the base material (also known as the parent material or substrate) where the rivet nut will be installed. The best tool for this job is a digital or dial caliper, which provides an exact measurement. If you are fastening through multiple sheets of material, measure the total combined thickness. This measurement is the single most important piece of data you need.
Step 2: Consult the Rivet Nut Data Sheet
Every reputable rivet nut manufacturer, including Rivet JL, provides detailed data sheets for their products. These charts contain all the critical specifications you need, including the grip range. You will cross-reference your measured material thickness with the grip ranges listed for different rivet nut part numbers. Your material thickness must fall comfortably within the minimum and maximum values listed.
Example Rivet Nut Grip Range Table:
| Part Number | Thread Size | Drill Hole Size (in) | Grip Range (in) | Grip Range (mm) |
|---|---|---|---|---|
| RJL-S-1420-130 | 1/4″-20 | 0.352 | 0.020 – 0.130 | 0.51 – 3.30 |
| RJL-S-1420-200 | 1/4″-20 | 0.352 | 0.130 – 0.200 | 3.30 – 5.08 |
| RJL-A-M6-250 | M6x1.0 | 0.354 (9.0mm) | 0.020 – 0.150 | 0.50 – 3.81 |
As you can see, if your material is 0.150 inches thick, you would choose part number RJL-S-1420-200, not RJL-S-1420-130.
The Anatomy of a Perfect Rivet Nut Installation
With the correctly matched rivet nut in hand, a perfect installation is achievable by following a precise methodology. It’s a combination of preparation, process, and post-installation verification.
Pre-Installation Checklist
- Correct Hole Size: The hole must be drilled to the exact size specified on the data sheet. A hole that is too small will damage the rivet nut, while a hole that is too large will allow it to spin.
- Clean & Deburred Hole: Ensure the hole is clean and free of burrs or debris that could interfere with seating.
- Proper Installation Tool: Use a high-quality manual, pneumatic, or hydro-pneumatic rivet nut tool. Ensure it is calibrated and set correctly for the rivet nut size and type.
The Step-by-Step Installation Process
- Thread the Rivet Nut: Thread the rivet nut completely onto the mandrel of the installation tool until it is snug.
- Insert into Hole: Firmly insert the rivet nut into the pre-drilled hole. The flange or head should sit flush and tight against the material surface.
- Activate the Tool: Squeeze the handles or activate the trigger of the tool. This retracts the mandrel, collapsing the unthreaded shank.
- Form the Upset: You will feel a sharp increase in resistance as the shank fully compresses and forms the backside bulge. This is the critical “setting” of the fastener.
- Release and Inspect: Unthread the mandrel from the now-installed rivet nut. The fastener should be tight, secure, and ready for a bolt.
Visual Cues of a Correct Installation
A properly installed rivet nut will have a uniform, symmetrical bulge on the blind side that clamps down tightly against the material. On the front side, the head will be flush and immobile. There should be no gaps between the rivet nut head and the parent material, and the fastener should resist any attempt to spin it by hand. It feels solid and permanent because it is.
How to Troubleshoot Common Rivet Nut Installation Failures
Even with careful preparation, issues can arise. Understanding why they happen is key to preventing them. Most problems trace back to grip range, hole size, or tool settings.
Problem: The Rivet Nut is Spinning in the Hole
Causes: This is the most common failure. The primary cause is an incorrect grip range (usually too long for the material), preventing the bulge from properly clamping. Other causes include an oversized drill hole or under-stroking the installation tool, which fails to fully form the upset.
Solution: Verify your material thickness and ensure you are using a rivet nut with the correct grip range. Measure your drill bit and hole to confirm it matches the spec sheet. Ensure your tool is completing its full stroke to achieve proper compression.
Problem: The Threads are Stripped
Causes: Threads can be stripped in the rivet nut or on the tool’s mandrel. This is often caused by over-stroking the installation tool (applying too much pulling force) or by misaligning the tool, which places lateral stress on the threads during installation.
Solution: If you are using a pressure-based pneumatic tool, reduce the air pressure. If using a stroke-based tool, adjust the stroke length. Always ensure the tool is held perpendicular to the work surface during installation to prevent cross-threading and misalignment.
Problem: The Bulge is Deformed or Incomplete
Causes: A malformed bulge directly points to an installation error. The most likely culprit is using a rivet nut with a grip range that is too short for the material. It can also be caused by under-stroking the tool, not allowing the shank to collapse fully.
Solution: Immediately stop and re-measure your material thickness. You almost certainly need a rivet nut with a longer grip range. Confirm your tool settings are sufficient to fully form the upset for the size and material of the rivet nut you are installing.
Beyond Grip Range: Other Critical Factors for Rivet Nut Selection
While grip range is paramount, a truly professional installation considers the entire system. To ensure longevity and performance, you must also consider these factors.
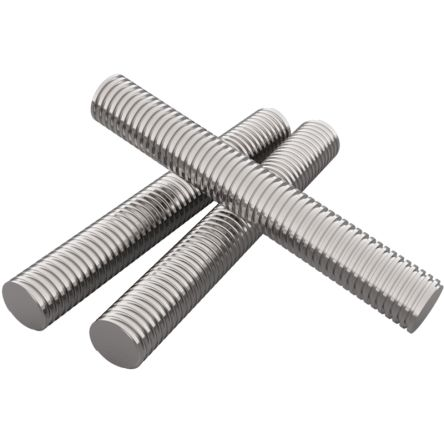
Material Compatibility
The material of the rivet nut (e.g., steel, stainless steel, aluminum) should be compatible with the parent material and the bolt you intend to use. This prevents galvanic corrosion, a process where dissimilar metals in contact can cause one to corrode prematurely. For example, use aluminum rivet nuts in aluminum sheets and stainless steel rivet nuts for applications requiring high corrosion resistance.
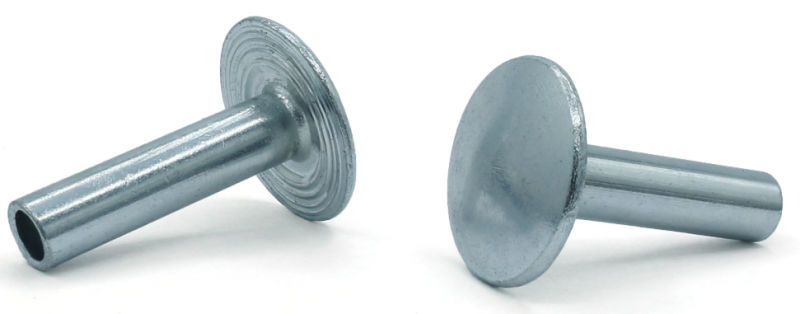
Head Style
The head of the rivet nut also plays a role. A flat head provides a large surface area for strong push-out resistance. A low-profile or countersunk head allows for a near-flush finish, which is critical for cosmetic applications or where no protrusion is allowed.
Body Type
The standard body for a rivet nut is round. However, for applications requiring maximum resistance to spinning, a hex or square body is superior. When installed in a matching hex-shaped hole, it provides mechanical locking that makes spinning under high torque nearly impossible.
Partner with Rivet JL for Precision and Reliability
Mastering rivet nut installation is a science of precision. It begins and ends with selecting the right fastener for the job, and the most critical variable is the grip range. By carefully measuring your material and consulting the manufacturer’s data, you can eliminate the primary cause of failure and create strong, reliable joints every time.
At Rivet JL, we don’t just sell fasteners; we provide solutions. Our extensive inventory of high-quality rivet nuts is backed by comprehensive data sheets and expert support. If you’re ever unsure about which grip range, material, or style is right for your project, our team is here to help. Contact us today to ensure your next project is built on a foundation of strength and precision.
Anchor Text & Internal Linking Suggestions
- “high-quality rivet nuts” -> Link to the main rivet nut product category page.
- “data sheets” -> Link to a technical resources or downloads page on your site.
- “steel, stainless steel, aluminum” -> Link to the respective material sub-category pages.
- “flat head,” “countersunk head” -> Link to a page or filter explaining different head styles.
- “hex or square body” -> Link to the hex body rivet nut product page.
- “Contact us today” -> Link to your website’s contact page.