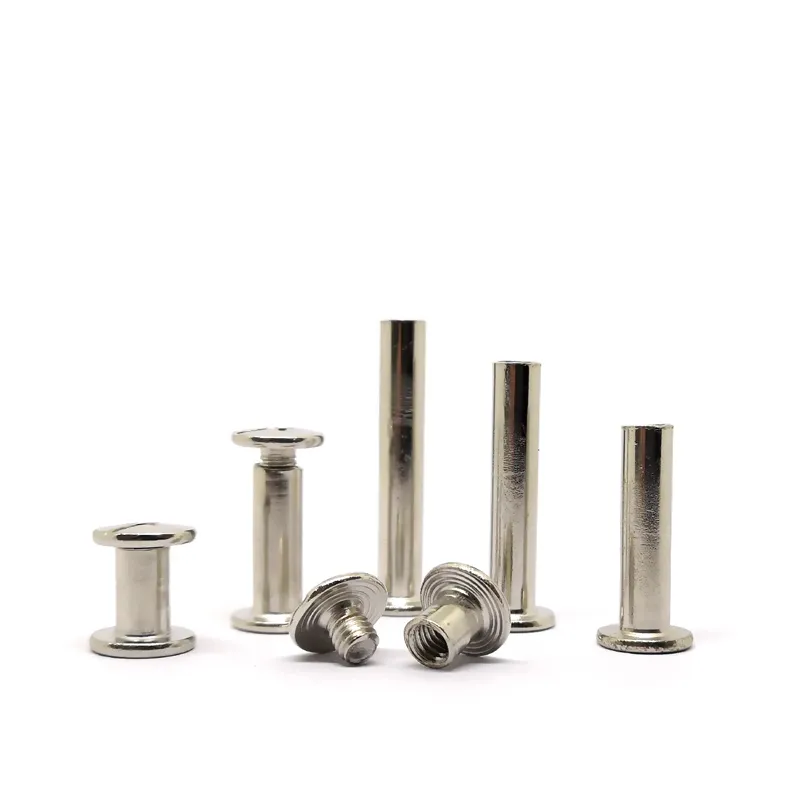
Even the most precisely engineered fastener will fail if the assembly process is flawed. When executing a male-female rivets installation, the structural integrity of the final product relies entirely on proper hole preparation, exact dimensional matching, and calibrated tooling.
In our experience supporting high-volume manufacturing floors, joint failures rarely stem from defective hardware. Instead, they originate from a handful of preventable operator and procedural errors. Whether you are assembling heavy-duty automotive panels or delicate electronic enclosures, understanding these mechanical pitfalls will help you eliminate rework and ensure a permanent, unyielding connection.
1. The Anatomy of an Installation Failure
Before adjusting your assembly line, it is crucial to understand how improper installation physically damages both the fastener and the host material. When a male-female rivet is improperly set, the kinetic energy from the riveting tool is misdirected. Instead of forming a clean, symmetrical mechanical interlock, the force causes asymmetric expansion, shank buckling, or severe radial stress that cracks the surrounding substrate.
Below is a comprehensive technical matrix outlining the most frequent installation errors we encounter, the physical damage they cause, and the engineering best practices required to avoid them.
Table: Common Male-Female Rivets Installation Errors and Corrective Actions
| Installation Error | Physical Consequence & Damage | Preventative Engineering Action |
| Incorrect Hole Diameter (Too Big/Small) | Rivet wobbles under load; incomplete tail expansion; severe drop in shear strength. | Strict drill tolerance. Hole diameter should be ≈ Rivet Diameter + 0.1 to 0.2mm. |
| Mismatched Grip Range | Fastener cannot clamp fully (too long) or crushes the material / fails to flare (too short). | Accurately measure total material thickness (including coatings) and select the exact matching grip range. |
| Angled / Non-Vertical Pressing | Asymmetrical tail expansion; localized stress concentration causing material to crack. | Utilize vertical positioning jigs or robotic end-of-arm tooling to ensure 90-degree alignment. |
| Hole Edge Burrs & Contamination | Fastener head cannot seat flush; poor environmental sealing; introduces micro-gaps. | Implement a dedicated deburring and surface cleaning station prior to assembly. |
| Improper Tool Force Settings | Insufficient pull/push leaves the joint loose; excessive force fractures the rivet body. | Regularly calibrate pneumatic/hydraulic tools and set tonnage according to fastener specs. |
2. Deep Dive: 3 Field Cases of Installation Damage
To truly understand how these errors manifest on the production floor, let’s look at three real-world manufacturing cases where improper male-female rivets installation compromised the product, and how the assembly processes were corrected.
Case 1: The “Wobbling” Joint Caused by Oversized Holes
In a recent sheet metal panel connection project (similar to those found in automotive body assemblies), the factory floor was experiencing a high failure rate during quality control shake-tests.
- The Problem: The drill bits used to create the clearance holes had worn out, creating an elliptical, oversized hole. Because the hole was too large, the male-female rivet could not anchor itself against the hole walls during the setting process. Even after the tail was expanded, the rivet could wobble slightly side-to-side. This loose fit drastically reduced the joint’s shear and tensile load-bearing capacity.
- The Solution: The fundamental rule of male-female riveting is tight clearance. We advised the manufacturer to implement a strict tooling replacement schedule and standardize the hole diameter to be exactly 0.1mm to 0.2mm larger than the rivet shank. This micro-clearance ensures the rivet slides in smoothly but locks rigidly against the hole walls once expanded, restoring full structural strength.
Case 2: Incomplete Tail Expansion from Grip Range Errors
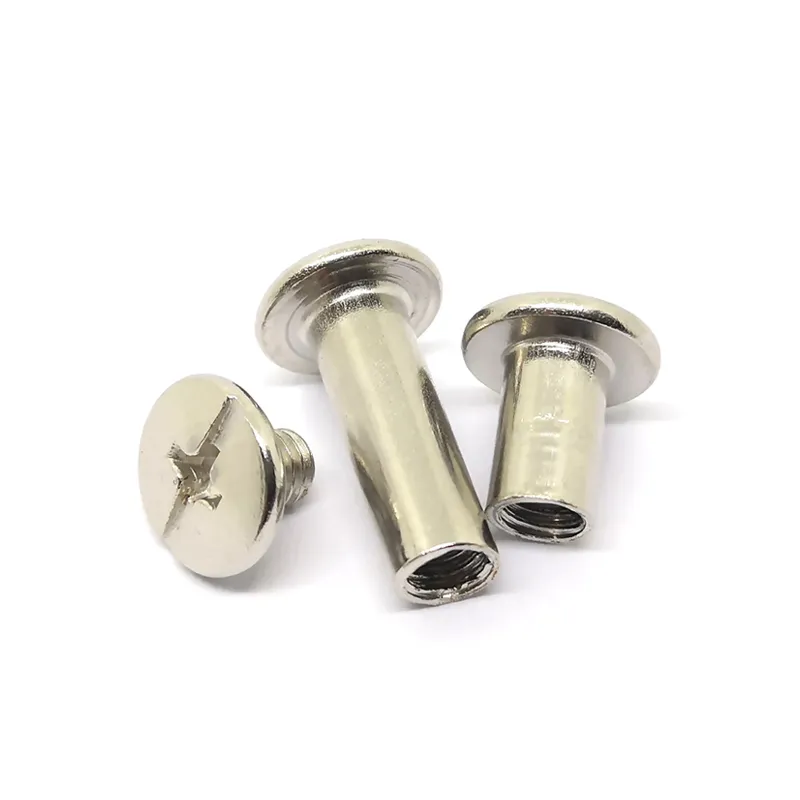
Grip range is the specific thickness of material a rivet is designed to hold. Confusing grip range with the rivet’s overall length is a frequent procurement error that destroys joints.
- The Problem: An electronics manufacturer was assembling thin chassis plates. They selected a male-female rivet with a grip range that was too small for the combined thickness of the plates and the internal gasket. Because the fastener was too short, the tubular tail did not protrude far enough out the back of the hole. When the tool applied pressure, the tail could not completely fold over and expand, resulting in a weak, easily separated joint.
- The Solution: Proper installation requires the tail to form a complete mechanical lip. The factory engineers were instructed to physically measure the total stacked material thickness (including the compressed state of the gasket) using digital calipers. By selecting a new rivet whose specified grip range fully encompassed this measurement, every subsequent rivet achieved a perfect, secure tail flare.
Case 3: Material Cracking Due to Tilted Tooling
The geometry of the setting force must be perfectly perpendicular to the workpiece. Manual installation using handheld rivet guns often introduces human error in the form of tilting.
- The Problem: During a field assembly operation, operators were installing male-female rivets while reaching across wide panels, causing them to tilt the riveting gun slightly off the vertical axis. This angled installation forced the rivet tail to expand asymmetrically—bulging heavily on one side and barely moving on the other. This uneven expansion created a massive localized stress point, causing the surrounding metal to develop micro-cracks.
- The Solution: Relying on the naked eye for a 90-degree alignment is insufficient for structural joints. We recommended the integration of simple positioning jigs and spring-loaded vertical alignment guides on the riveting tools. By physically restricting the tool to a perfectly vertical orientation, the tail expansion became perfectly symmetrical, entirely eliminating localized material fracturing and improving overall connection reliability.
3. The Importance of Cleanliness and Tool Calibration
Beyond sizing and geometry, environmental and mechanical hygiene play a massive role in successful male-female rivets installation.
When a hole is drilled or punched, it often leaves a sharp metal burr or debris around the edge. If this is not cleaned, the head of the rivet will sit on top of the burr rather than flush against the flat surface of the material. This creates a micro-gap that destroys any weather-sealing properties and acts as a fulcrum point, increasing the risk of the rivet head snapping off under lateral vibration.
Furthermore, your fasteners are only as good as the tools setting them. A pneumatic press running at 80 PSI when the fastener requires 110 PSI will result in a dangerous, under-set joint. Conversely, applying excessive force will crush the substrate or fracture the rivet’s internal locking mechanism. Regular dynamometer calibration of your setting tools is a non-negotiable maintenance requirement.
4. Conclusion: Engineering a Flawless Assembly
Avoiding damage during a male-female rivets installation comes down to controlling your variables. By maintaining sharp drill bits for precise hole sizing (shank + 0.1-0.2mm), meticulously calculating your total material grip range, keeping your tools perfectly perpendicular, and eliminating surface burrs, you transition from a process prone to rework to a highly stable, predictable manufacturing line.
Are you experiencing cracking, wobbling, or inconsistent seating on your assembly line?
Review your hole tolerances and tool alignments today, and ensure your procurement team has matched the exact grip range to your real-world material stack-up.
5. Frequently Asked Questions (FAQ)
1. What happens if I drill the hole exactly the same size as the rivet diameter?
While it sounds ideal, a “size-on-size” hole is an interference fit. You will have to hammer or force the rivet into the hole, which can damage the fastener’s surface plating (leading to rust) or bend the shank before the actual installation even begins. Always leave a 0.1mm to 0.2mm clearance.
2. How do I fix a hole that was drilled too large?
If the hole is oversized, you cannot use the standard rivet safely. You must either upsize the hole further to accept the next standardized diameter of male-female rivet, or use a specialized structural blind rivet designed to swell massively and fill oversized holes.
3. Why is my rivet tail splitting like a banana peel when I install it?
Tail splitting is usually caused by one of three installation errors: the setting anvil (tool tip) is worn out and applying uneven pressure, the press force is set too high, or the rivet material itself is not properly annealed (softened) for flaring.
4. Can I install a male-female rivet without a specialized press?
If you are using a threaded (screw-type) male-female rivet, you only need standard screwdrivers. If you are using a structural press-fit or crimped version, you absolutely must use a calibrated pneumatic, hydraulic, or hand-squeeze riveter equipped with the correct anvil dies to form the metal properly.
5. How critical is deburring the hole?
Extremely critical. A burr prevents the underside of the rivet head from making flush 360-degree contact with the material. This significantly lowers the pull-through strength of the joint and creates an entry point for moisture and corrosion.
6. What is the best way to ensure the rivet tool stays perfectly vertical?
For manual operations, use a tool balancer suspended above the workstation to bear the weight of the gun, and attach a simple bubble level or a spring-loaded nosepiece guide. For automated lines, rigid C-frame presses inherently guarantee a 90-degree approach.
7. Can an incorrect grip range cause the rivet to spin freely after installation?
Yes. If the grip range is too large for the material thickness, the tool will reach the end of its stroke before the rivet tail has tightly clamped against the back plate. The rivet will be fully formed but loosely trapped in the hole, allowing it to spin.